If you're following a tutorial, use the Blender version used in the tutorial. You can see in the video, Blender 3.4 Alpha was used. The problem here is, alpha versions are prototypes, their functionality is subject to change, it's a work-in-progress. So unlike Beta versions which are unstable, Alpha versions are more unstable and their feature (like available nodes) may change. This is why I think it's a poor idea to create educational content based on alpha versions (and this is why I think I never used such versions here on BSE).
I think as a general rule, when you see a material made in version X.Y Alpha, you should try versions X.(Y-1) Stable and X.Y Stable. It doesn't guarantee success, because some future are introduced in the development cycle only to be removed at the end of the alpha cycle (like recently Simulation Nodes or viewport Compositor). They may be available in forks, or in newest alphas as experimental features etc. - it requires some research to find them.
In your case, the "Transfer Attribute" node was available in versions 3.0-3.3 (or 2.93α-3.4α I think). You can use a tool like Blender Launcher to download B3.3 and try to create the node tree from the tutorial in that version. Once you're done, you can save your project and reopen it in a newer version, Blender will then convert the old way to the new way by replacing the nodes. At least in this case, of "TA" nodes, Blender does a good job of converting to a new version.
Here's an example, a 3.0 project opened in Blender 3.0:
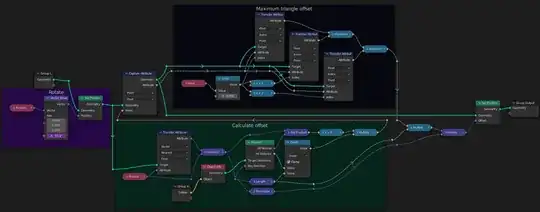
And the same file opened in Blender 3.5:
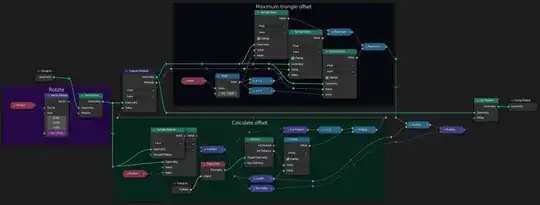
You can see the positioning is not as pretty, especially in the case where one node was replaced by two nodes:
 →
→ 
So "Transfer Attribute" by index simply became "Sample Index", whereas "TA" in "nearest" mode became two nodes: first find the index of the nearest element using "Sample Nearest", and then use that obtained index in the "Sample Index" node.