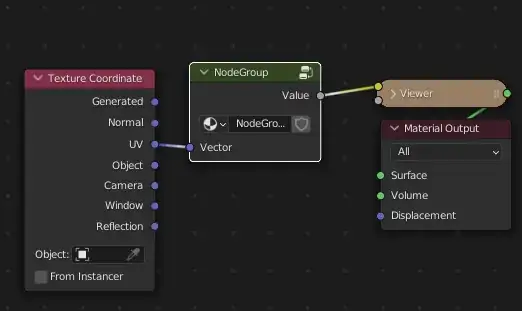
I am making a bubble wrap material for work and I follow Default Cube's tutorial on YouTube. I want my dots to be aligned diagonally, (like the second image), I attached the nodes as well. What do I have to do?
-
1If you need your cells to overlap (have the bubbles nestle up together) then the hex-grid group at the bottom of this answer might help – Robin Betts Dec 21 '21 at 14:12
3 Answers
I'm afraid there is no way to achieve the exact result that you showed with this current method. There is a quick hack to get a similar result tho, and I don't know if it would suit you but you can just rotate the texture so that instead of appearing to be aligned horizontally, your dots would appear to be aligned diagonally, this is your current output :
And this is the output if you rotate the texture :
You can achieve this by simply adding a Texture coordinate and a Mapping before your voronoi like so (if you have node wrangler add-on enabled, you just select the voronoi node and press CTRL + T) :
Then on the Mapping node, you change the Z Rotation from 0 to 45 deg like the screenshot above.
Let me hear if it helped.
- 3,036
- 7
- 22
@mqbaka's solution is really snappy, and the way to go. But if you need a hexagonal grid for bubblewrap, where rows intrude on one another, then the group explained here might be handy, especially if you want to get down into the weeds, varying the exact behaviour at the edges of cells, etc.
Here's a first-shot example of using just the 'Distance From Center' output to control displacement, for a bubblewrap shader:
If this was for a closeup, you would need to go further than the result below, to dent and deflate some bubbles, etc.. but things like the 'Cell ID' output would help you select out some cells.
- 76,260
- 8
- 77
- 190
I also found an alternate solution that is actually simple. The idea is to create a dot pattern, duplicating it then offset the second one and finally mixing the two together. This is the result I obtained with this method :
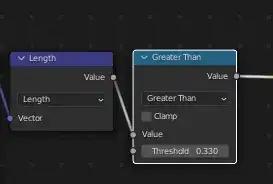
The dot pattern is created with the Texture Coordinates's UV output and a Vector Math set to length :
Adding a Math node set to Greater Than gives the circle shape :
To have the pattern, we just add a Mapping node and a Vector math set to Fraction right after the Texture Coordinates :
The number of rows and columns are decided by the value of the X and Y components of the Scale of the Mapping node.
Now we have the pattern, we can group everything together for easy duplication :
Pressing Tab will allow us to edit the node group and expose a few of the values so that they can be controlled outside the node group :
Now you can just duplicate the group, give it an offset of 0.5 and now we have the second variation but we need to find a way to mix them together. We can do it by using this mask :
Which can be created with this node setup :
It takes the same vector input as the group node and the input value at the begining is plugged to the Grid Size of both node groups which aligns automatically the black and white lines to each row of the pattern.
Now, we just have to mix the two patterns with the mask as factor to have the final result :
- 3,036
- 7
- 22


