1

I am trying to create a 3D resistor with blender, and so far I have a pill shape object. But when I try to draw the color stripes of the resistor with the Grease Pencil the color just hangs in mid air. I want that color stripe to be on the pill shaped object.

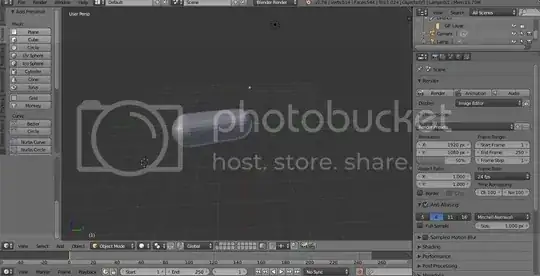
Here is what I have so far.

Not Finished Resistor

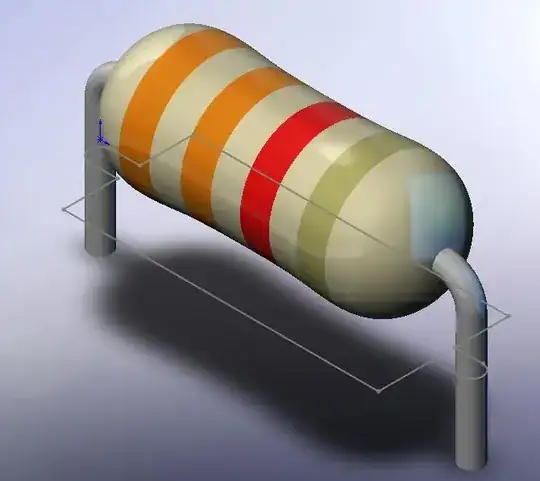
I would like it to look something like this.

Example Resistor

Also, if you guys can give me some tips on how to create the wires coming out of the resistor that would be great.

Thanks in advance.

SickAF_Shoot
  • 11
  • 1
  • 3
  • You can switch Grease Pensil to snap to object but I'd say this isn't what is used in such case. You can use texture painting to draw those stripes as a BW mask to mix different materials with it. – Mr Zak Feb 04 '16 at 22:24
  • Related: http://blender.stackexchange.com/questions/516/add-different-materials-to-different-parts-of-a-mesh –  Feb 04 '16 at 23:32

3 Answers3

2

Roughly, I built your scene. I generally use Cycles so there may be a better way in Internal, but this works pretty well.

First, add a material by clicking the (+) button. You will be presented with this page.enter image description here

Make the suggested edits, such as changing the diffuse and specular colors and increasing the specular intensity from 0.5 to 0.7. You can rename the material to something like pill or resistor body.

Next, click the other plus button, the one next to the light grey drop down menu. This will give you a new material slot. Change the diffuse, specular, and intensity values for your next color (red, green, or orange according the picture). Repeat this step for the next two colors. Don't worry that they are not yet showing up on your model.

Now, press tab to enter edit mode and use Ctrl+R to add loop cuts. Do not left or right click yet. Press (4) at the top of your keyboard and move your mouse around your object until the loop cuts are positioned around the main cylindrical body.

Now left click to confirm. Change into edge select mode and select only the loop cuts you just made. It might help to hold Alt and right click on the edge. Key Ctrl+B and drag your mouse outward to create strips. Just don't drag too far. Change to face select mode. Select the faces where you want a certain color to be (using Alt+loop again), select that material in the materials panel, and click assign. You should now see a colored stripe on your model. Repeat for the other stripes.

Now tab back to object mode and change the rotation so that it is only rotated 90 on the x axis (no Z rotation.) Tab back into edit mode and select the smallest loop of faces on either end where you want the wires to be. Key E, S, Y, and drag outward to desired length. Now extrude once more, but just a little bit. Rotate each end 45 degrees on the x axis so they are pointed half downwards. Now key E, Z, and drag down a bit beyond the desired length. Tab out of edit mode.

Almost there...

Shift+A, Mesh, plane. S to scale it up. Drag down on the z so that only the resistor and the part of the wire that you want visible is showing.

Rendering

Go into the tools panel, the tools section, and shade Smooth. Drag the light over the resistor so that the shadow will cast directly down. In the light's object data panel, up the samples to 5. Set up the camera to point where you want it, up the resolution on the render panel to 100% (in the dimensions box). Click Render!

My finished result: enter image description here

Shady Puck
  • 8,847
  • 6
  • 34
  • 61
1

It seems you are using the Blenders internal render. In “Edit Mode” make several loop cuts along the length of your mesh. Select your mesh and add a material the color of your base (Off white in the example you linked).

Add another color by pressing the “+” button next to your existing material. Then in “Edit Mode” select the faces you want to color with the second color you just created. Then press the “Assign” button below your material. Rinse and repeat for you additional colors.

Dontwalk
  • 3,711
  • 1
  • 18
  • 33
0

As noted, for multiple materials this is done in mode by selecting the desired faces and assigning the active material. For the object itself, you can use curves. Use a bezier curve for the 'legs' of your transistor object. Start by snapping the cursor to selected after selecting the main shape of your object, then add the curve to place it exactly inthe center of the object and start shaping the legs. When you have them as you like, go to object mode and add a bezier circle to use as a bevel object. You will see this setting in the curve properties in the properties panel

Scale the circle down until the 'legs' are to your liking, and we are ready for the wire that runs around the transistor. For this, you can go into top ortho view. Add another bezier circle and subdivide a couple times. Add a plane to use as a visual guide for the shape, and again use a bezier circle for your bevel object. You can be more artistic than my render below, but I didn't want to take all night to get an answer out, this is my result. enter image description here

.blend is here for your reference:

Timaroberts
  • 12,395
  • 6
  • 39
  • 73