4

How can one achieve the following effect (sometimes called a "(directional) gradient outer glow") in LaTeX?

enter image description here

Here are two further examples of this style I found on Google:

Related:

  1. Here's a question on TeX SE about plain color (i.e. no gradient) outer glow.
  2. Here's a question on Graphic Design SE mentioning a couple techniques for doing this on Photoshop, maybe one of them is adaptable to TikZ (how so is beyond my understanding/ability with it). The "Version of Oct 03, 2023" image above has been created on Photoshop using Method 2 from this answer there.

Edit: The reason I wanted to create this using LaTeX is that the "Version of Oct 03, 2023" is really Version of \today, and it is meant to be used in a title page for a book that will be rebuilt with a certain frequency (say once a week), and updating the date manually every time on Photoshop/InDesign would take a lot of work, which I was hoping could be avoided with automation.

A solution that outsources this effect to another program would be just as good, as long as it can be automated. E.g., a python script that takes as input a string of text and renders an SVG or PNG file with the text+effect (say by processing it with inkscape or some other program) would work perfectly (as then we could just write another script to create the title page by calling this helper script a couple times, and using e.g. subprocess to then call LaTeX to compile it.)

Emily
  • 211
  • 3
    Why a downvote? There is the OP's effort here. – Przemysław Scherwentke Oct 05 '23 at 10:46
  • 1
    The tikz/pgfmanual states "Tikz is not a drawing program" (or German: Tikz Ist Kein Zeichenprogramm). Though it's very versatile, you examples are more suited and easier to generate by a dedicated drawing program. // If you can save those drawings in SVG-format, e.g. like when using Inkscape, you can load and display such code in Latex, too. See e.g. the SVG-tag: https://tex.stackexchange.com/questions/tagged/svg . // If you can add SVG-code of a drawing you are after, I'm sure, somebody here will add the Latex code, too. – MS-SPO Oct 05 '23 at 13:12
  • You may also want to have a look at glow: https://tex.stackexchange.com/search?q=glow – MS-SPO Oct 05 '23 at 13:18
  • 1
    @MS-SPO and cfr I've updated the question explaining why I'm trying to replicate this effect in LaTeX. In the end, outsourcing it to Inkscape or some other program would be just as good, the main point I'm after is automating this process, instead of having to change the date manually in Photoshop/InDesign for every update. – Emily Oct 05 '23 at 22:03
  • @Emily, if you weekly write to the same filename, be it an image, svg or pdf format, say ˋtitle.xyz ˋ , each Latex compile „automatically“ has the correct one. // If the titles filename needs to vary, you can use a script e.g. to copy it into the proper location of your Latex source, e.g. shell scripts (MS-DOS, bsh, ksh etc., Python, Perl, php etc.). It also may or may not start the Latex compiler, depending on how you want to organize your project.. – MS-SPO Oct 06 '23 at 00:53
  • @cfr, exemplified: week1 .. title.xyz . Week2 .. title.xyz . Weekn .. title.xyz . Just one approach, using a kind of brute force. – MS-SPO Oct 06 '23 at 01:09
  • @cfr, according to the inventive principle „do a little less“ just one file with directional gradient, which is overwritten at each weekly update. That simplifies this part, and delegates to archiving the books pdf properly. / Just one way to do it. – MS-SPO Oct 06 '23 at 06:48
  • @cfr, point of view: a) overwrite the title.xyz (with the gradient) at a fixed location, b) update the book.tex, c) compile the book ... and it's correct by-itself, i.e. automatically ;-) Subsequent problem: archiving (e.g. via git), versioning (e.g. via git) ... which is typical by-product of an inventive solution (new problems, irrelevant before, often simpler). // There are many more approaches, including the classical ones already mentioned. Finally it all depends on what the OP wants, really needs, has available and is willing to spend in terms of effort. – MS-SPO Oct 06 '23 at 19:23
  • @cfr I've elaborated a little about what I was attempting to do here. Automating the effect was crucial, as the text actually updates every commit, instead of every week. – Emily Oct 06 '23 at 22:59
  • @Emily That's what I was trying to explain! We should tidy up to save some mod getting pinged about our comments ;). – cfr Oct 06 '23 at 23:29
  • @MS-SPO We should tidy up since Emily explained what I was trying to say in response to your answer ;). [I'd use subversion rather than git because I like having the version info in the files, but I know git's meant to be better in other ways.] – cfr Oct 06 '23 at 23:32
  • @cfr On tidying: I'll tidy up my comments too if MS-SPO agrees to do so. (Also I'd never heard about subversion! That seems quite interesting!) – Emily Oct 06 '23 at 23:38
  • 1
    @Emily It's older than git, but it has some features git doesn't. I like having the versioning info in the file and there are LaTeX packages which let you typeset it in drafts, for example. – cfr Oct 06 '23 at 23:41

3 Answers3

7

enter image description here

Considering @hpekristiansen remark and solution, I am proposing a modified version of my previous answer. It solves the problem when the number of symbols is big. The idea is the same though.

I enclosed the needed elements into a \newcommand, \Cfading for the tikzfadinngfrompicture, and a pic object, C-fading, for the graphical result.

The code

\documentclass[11pt, margin=10pt]{standalone}
\usepackage{tikz}
\usetikzlibrary{math, calc, fadings}
\usepackage{xcolor}
\usepackage[outline]{contour}
% \contourlength{.5pt}
\begin{document}

\newcommand{\Cfading}[3]{% text, font, scaling factor \begin{tikzfadingfrompicture}[name=Cfading] \path node[scale=#3] (0, 0) (noneCF) {% \fontfamily{#2}\selectfont \contour{transparent!0}{#1} }; \end{tikzfadingfrompicture} \tikzmath{% real \sc; % scaling factor \sc = #3; } } \tikzset{% CE fading/.style={% path fading=Cfading, shade, fit fading=false, opacity=.02% }, CI fading/.style={% path fading=Cfading, shade, fit fading=false, opacity=.1% } } \tikzset{% pics/C-fading/.style 2 args={% top color, bottom color code={% \foreach \j in {1, 2, ..., 12}{% \begin{scope}[transform canvas={shift={(\j30: 2.2\sc pt)}}] \fill[CE fading, top color=#1, bottom color=#2] (noneCF.south west) rectangle (noneCF.north east); \end{scope} } \foreach \j in {1, 2, ..., 12}{% \begin{scope}[transform canvas={shift={(\j33: 1.1\sc pt)}}] \fill[CI fading, top color=#1, bottom color=#2] (noneCF.south west) rectangle (noneCF.north east); \end{scope} } \fill[path fading=Cfading, fit fading=false, color=white] (noneCF.south west) rectangle (noneCF.north east);
} } }

\Cfading{October 5, 2023}{lmdh}{3} \begin{tikzpicture}[evaluate={}] \path[use as bounding box] (noneCF.north west) rectangle ($(noneCF.south east) +(2, -2)$);

\path pic {C-fading={blue}{green}};

\begin{scope}[transform canvas={shift={(1 cm, -2cm)}}] \path pic {C-fading={magenta}{blue}}; \end{scope} \end{tikzpicture} \end{document}

Previous version of the answer

enter image description here

I tried to use tikzfadingfrompicture, see Tikz & PGF manual page 361, version 3.1.7, coupled with the library contour.

The number of symbols, for example October 5 in the example, is not very flexible. At least I couldn't handle it. If you need more symbols you have to define each word separately. Maybe somebody could fix the code from this point of view.

The code

\documentclass[11pt, margin=10pt]{standalone}
\usepackage{tikz}
\usetikzlibrary{fadings}
\usepackage{xcolor}
\usepackage[outline]{contour}
\contourlength{.5pt}
\begin{document}

\begin{tikzfadingfrompicture}[name=LRfading] \node%[inner sep=1ex, outer sep=2pt] {\fontfamily{lmdh}\selectfont \contour{red}{October 5}}; \end{tikzfadingfrompicture} \begin{tikzfadingfrompicture}[name=LKfading] \node%[inner sep=1ex, outer sep=2pt] {\fontfamily{lmdh}\selectfont \contour{blue}{October 5}}; \end{tikzfadingfrompicture} \begin{tikzpicture} \foreach \j in {1, ..., 12}{% \fill[path fading=LRfading, shade, left color=blue, right color=green, opacity=.04] (\j30: .15) rectangle ++(6, 4); \fill[path fading=LRfading, shade, left color=blue, right color=green, opacity=.05] (10 +\j30: .04) rectangle ++(6, 4); } \fill[path fading=LKfading, color=white] (0, 0) rectangle ++(6, 4); \end{tikzpicture} \end{document}

Daniel N
  • 5,687
7
\documentclass[tikz, border=1cm]{standalone}
\usetikzlibrary{fadings}
\usepackage[outline]{contour}
\begin{tikzfadingfrompicture}[name=myfading]
\foreach \i in {0.05,0.10,...,0.80}{
\contourlength{\i pt}
\node[opacity=0.1] {\fontfamily{ptm}\selectfont \contour{transparent!0}{\bf{Version of Oct 03, 2023}}};
}
\node[transparent!100] (n) {\fontfamily{ptm}\selectfont {\bf{Version of Oct 03, 2023}}};
\end{tikzfadingfrompicture}
\begin{document}
\begin{tikzpicture}
\shade[path fading=myfading, fit fading=false, top color=blue, bottom color=red] (n.south west) rectangle (n.north east);
\end{tikzpicture}
\end{document}

Text with red and blue glow

Edit: Better colors by removing whitespace from the shade.

\node[transparent!100, inner sep=0.80pt] (n) {\fontfamily{ptm}\selectfont {\bf{Version of Oct 03, 2023}}};

enter image description here

2

To end the discussion, culminating here, here's a sketch of the "do a little less" approach. It's typical for a solution using inventive principles that it's no longer needed to focus on Latex (in this case), use other available resources, and shift attention to other things, not needed before. AND ... it opens up new opportunities, which were not available before. This one became more procedural this way than latexian.

In its simples form it continuously overwrites the drawing of the week (new title) AND the book, and delegates backup or versioning to a dedicated tool, like git.

For this example, to illustrate the concept, I assume a kind of mix:

  • ONE file from a graphic tool ONLY (Inkscape, Illustrator, ArtWhatever), weekly stored as title.png, which never changes
  • one folder per week for the weekly book

So let's go.

Organizing files and folders

folders

This is something you have to decide on. This structure assumes:

  • /graphic will hold the title.png
  • which is overwritten weekly, i.e. lost as an individual file
  • (use git etc. to compensate for this loss)

For /book-n I assume, because the examples OP so likes it, to:

  • create a new one every week
  • copy /book-(n-1), rename it into /book-n
  • start editing its /book-n/book.tex

So inside it will look like this:

book-2

Accessing the weekly title

From inside folder /book-n it's always clear where to find the latest title-image:

  • ../graphic (/title.png)
  • no matter how complicated you distribute everything accross your computer (then the path will be a bit more complicated, too)

Graphics for the title page

I'm not claiming to be an artist. I used a painting -program, to create 2 drawings, exporting them to title.png week after week ...

Book-1, the first week

Just edit and compile:

week-1

\documentclass{book}
\usepackage{graphicx}
\usepackage{lipsum}

\begin{document}

% ~~~ this part you design only once ~~~~~~~~~~~~ \begin{titlepage} \includegraphics[width=\textwidth]{../graphic/title}% fixed location

\vspace{2cm}
\begin{center}
\Huge{
by

\vspace{\stretch{2}}
Super-Author
\vspace{\stretch{1}}
}
\end{center}

\end{titlepage}

% ~~~ here is your next version ~~~~~~~~~~~~~~~~~ \chapter{And so it begins}

\lipsum[1-2]

\end{document}

Book-2, the nextweek

Just edit and compile:

week-2

\documentclass{book}
\usepackage{graphicx}
\usepackage{lipsum}

\begin{document}

% ~~~ this part you design only once ~~~~~~~~~~~~ \begin{titlepage} \includegraphics[width=\textwidth]{../graphic/title}% fixed location

\vspace{2cm}
\begin{center}
\Huge{
by

\vspace{\stretch{2}}
Super-Author
\vspace{\stretch{1}}
}
\end{center}

\end{titlepage}

% ~~~ here is your next version ~~~~~~~~~~~~~~~~~ \chapter{What happened next}

\lipsum[3,7]

\end{document}

Automation-aspect

In fact, there is hardly or nothing to automate: the problem is gone, depending on how you organize it.

In this example, one new book-folder-per-week, it remains kind of tedious, as at least you need to copy and rename the book-folder. (Is it worth to automate that by a (shell-)script? May be not ... but you can do it.)

The title-drawing will be created new and overwritten anyway, so that's no extra work.

So, to get rid of the copy effort ... use one book-folder only AND a backup/versioning tool like git. I.e.:

  • work with a fixed structure
  • save, retrieve, branch etc. intermediate versions to your needs

P.S.: Just to be complete, this is a generic feature of so-called inventive solutions. They provide:

  • automation (in this case) AND no-automation (its opposite)

which translates here as:

  • no-automation: it's gone, because the concept or approach changed
  • automation: the effect of prior needed automation is provided.

Do you still need a script?

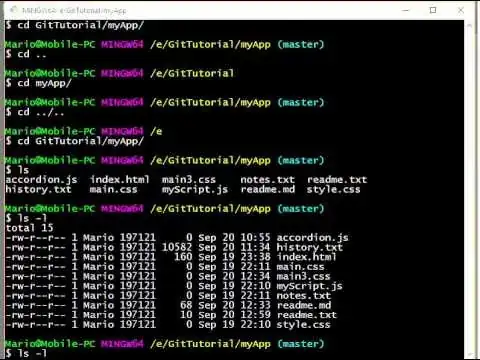
No, you replaced it either by nothing or the git-console (preferred) or the git-GUI ... like in this example from the net:

example

Any new opportunities on this path?

If you haven't used it before, using git you can:

  • save, save, save
  • name (intermediate) versions
  • retrieve, go back in time
  • branch, i.e. try a different route with your content
  • return to your previous branch/version if it doesn't work out nicely
  • etc.

If you use the ONE graphic ONE book-folder only approach AND overwrite it day by day, you've earned a clean evolving workspace on your computer.

And so on.

MS-SPO
  • 11,519
  • 1
    Thank you for the answer! The part I wanted to automate the most would be having to redraw the "Version of \today" in Photoshop (which is what I used to make the "Version of Oct 03, 2023" in the question body), since having to update that often would be quite tedious. – Emily Oct 06 '23 at 22:39
  • The final version I ended up with is going to be updated every commit, carrying the text "Version 087313f8, compiled on Oct 06, 2023.", where "087313f8" is the git commit identifier (this is built using a script from the Stacks Project, using the function print_version here: Link, which is called as in line 59 here. (I've adapted those to my use case though)) – Emily Oct 06 '23 at 22:39
  • Here's the result I arrived at, following hpekristiansen's answer: Link. (By the way, it seems the PDF rendering of the effect on the title page is kinda buggy on Firefox/Chromium (at least on Linux), so here's a PNG of it just in case: Link.) – Emily Oct 06 '23 at 22:39
  • (By the way, the font I'm using still doesn't have any kerning, so some pairs of letters look really weird, like the "Ve" in "Version") – Emily Oct 06 '23 at 22:51
  • 1
    @Emily Thanks. This is what I was miserably failing to explain above ;). Automating the rest is straightforward (at least if you're familiar with a versioning tool and scripting). Automating the production of the images is trickier. – cfr Oct 06 '23 at 23:28
  • @cfr Yep, it seems super tricky! Besides doing it in TikZ I was wondering if this could be doable with something like calling inkscape using the terminal line, or maybe doing the image processing in python with some of the libraries for it. These all sounded super hard to actually do though – Emily Oct 06 '23 at 23:37
  • @Emily I was actually wondering about Metapost. Are you providing some sort of alt text for visually impaired users or do they need to rely on the picture itself? – cfr Oct 06 '23 at 23:40
  • @cfr Oh I didn't know about Metapost! On alt text: I forgot to do so for the imgur PNG; I'll be sure to do this in the future! – Emily Oct 06 '23 at 23:45
  • @Emily I was really thinking about in your book ;). (But it's good to add it for Imgur, too, of course.) – cfr Oct 06 '23 at 23:47
  • @cfr Do you mean alt text for the image in the title page in the PDF? (Or for something else?) – Emily Oct 06 '23 at 23:48