4

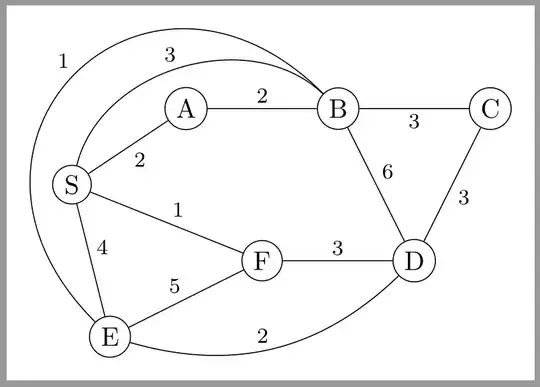
The following code

\begin{tikzpicture}[auto,node distance=2cm,>=latex]

% Posizionamento manuale dei vertici \node[circle,draw] (A) at (1,2) {A}; \node[circle,draw] (B) at (3,2) {B}; \node[circle,draw] (C) at (5,2) {C}; \node[circle,draw] (D) at (4,0) {D}; \node[circle,draw] (E) at (0,-1) {E}; \node[circle,draw] (F) at (2,0) {F}; \node[circle,draw] (S) at (-0.5,1) {S};

% Disegno degli archi con pesi \draw (A) -- node {$2$} (B); \draw (A) -- node {$2$} (S); \draw (S) to[out=90,in=120] node[above] {$3$} (B); \draw (S) -- node {$1$} (F); \draw (S) -- node {$4$} (E); \draw (E) -- node {$5$} (F); \draw (E) to[out=0,in=220] node[above] {$2$} (D); \draw (F) -- node {$3$} (D); \draw (C) -- node {$3$} (D); \draw (C) -- node {$3$} (B); \draw (B) -- node {$6$} (D); \draw (B) to[out=90,in=120] node[above] {$1$} (E); \end{tikzpicture}

produces the following graph:

enter image description here

Upon closer inspection, it is apparent that the edge from B to E overlaps with other edges and the node A. I am seeking guidance on how to reroute this particular edge to the left of nodes S and A, preventing overlap with other edges and nodes. Any assistance on achieving this would be greatly appreciated.
Mark
  • 755

2 Answers2

4

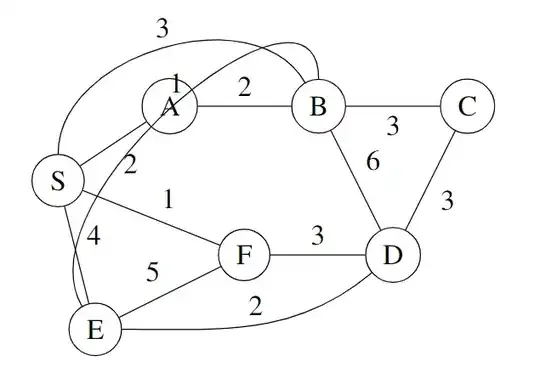
A solution is to use the key looseness=2 for the \draw command. Also the keys out and in are changed. The option overlay is added so that the bounding box does not become too large.

enter image description here

\documentclass[border=6pt]{standalone}
\usepackage{tikz}
\begin{document}
\begin{tikzpicture}[auto,node distance=2cm,>=latex]

% Posizionamento manuale dei vertici \node[circle,draw] (A) at (1,2) {A}; \node[circle,draw] (B) at (3,2) {B}; \node[circle,draw] (C) at (5,2) {C}; \node[circle,draw] (D) at (4,0) {D}; \node[circle,draw] (E) at (0,-1) {E}; \node[circle,draw] (F) at (2,0) {F}; \node[circle,draw] (S) at (-0.5,1) {S};

% Disegno degli archi con pesi \draw (A) -- node {$2$} (B); \draw (A) -- node {$2$} (S); \draw (S) to[out=90,in=120] node[above] {$3$} (B); \draw (S) -- node {$1$} (F); \draw (S) -- node {$4$} (E); \draw (E) -- node {$5$} (F); \draw (E) to[out=0,in=220] node[above] {$2$} (D); \draw (F) -- node {$3$} (D); \draw (C) -- node {$3$} (D); \draw (C) -- node {$3$} (B); \draw (B) -- node {$6$} (D); \draw[looseness=2,overlay] (B) to[out=110,in=130] node[above] {$1$} (E); \end{tikzpicture} \end{document}

matexmatics
  • 4,819
4

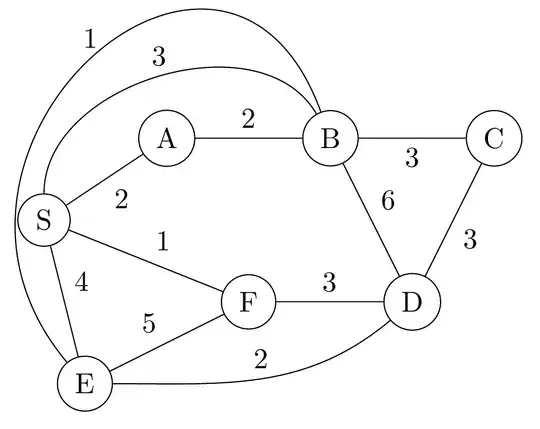
By use of the bbox and quotes libraries the image code is a bit shorter, more clear and resulted image is much nicer (without extra white space around it):

\documentclass[margin=3mm]{standalone}
\usepackage{tikz}
\usetikzlibrary{bbox,
                quotes}

\begin{document} \begin{tikzpicture}[bezier bounding box, C/.style = {circle, draw, inner sep=2pt}, every edge quotes/.style = {auto, font=\footnotesize, inner sep=2pt}, ] % Posizionamento manuale dei vertici \begin{scope}[nodes=C] \node (A) at (1, 2) {A}; \node (B) at (3, 2) {B}; \node (C) at (5, 2) {C}; \node (D) at (4, 0) {D}; \node (E) at (0,-1) {E}; \node (F) at (2, 0) {F}; \node (S) at (-.5,1){S}; \end{scope} % Disegno degli archi con pesi \draw (A) edge["$2$"] (S) (A) edge["$2$"] (B) (S) edge[bend left=60,"$3$"] (B) (S) edge["$1$"] (F) (S) edge["$4$"] (E) (E) edge["$5$"] (F) (E) edge[bend right,"$2$"] (D) (E) edge[bend left=90, looseness=2, "$1$"] (B) (F) edge["$3$"] (D) (C) edge["$3$"] (D) (C) edge["$3$"] (B) (B) edge["$6$"] (D); \end{tikzpicture} \end{document}

BTW, in your code fragment you define arrows head which than is not used in the picture. So it is a bit unclear, is your graph is directed (edges have arrows heads) or not. MY MWE consider the latter case:

enter image description here

Zarko
  • 296,517