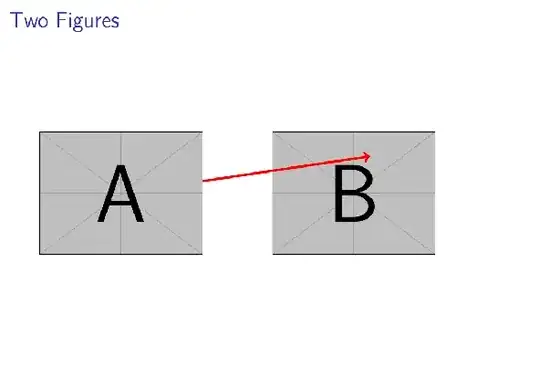
There's a useful method for drawing over images without requiring remember picture. I'd use this with the two images in a single tikzpicture. The slides below demonstrate steps in the method. You would not include the first two in your final version.
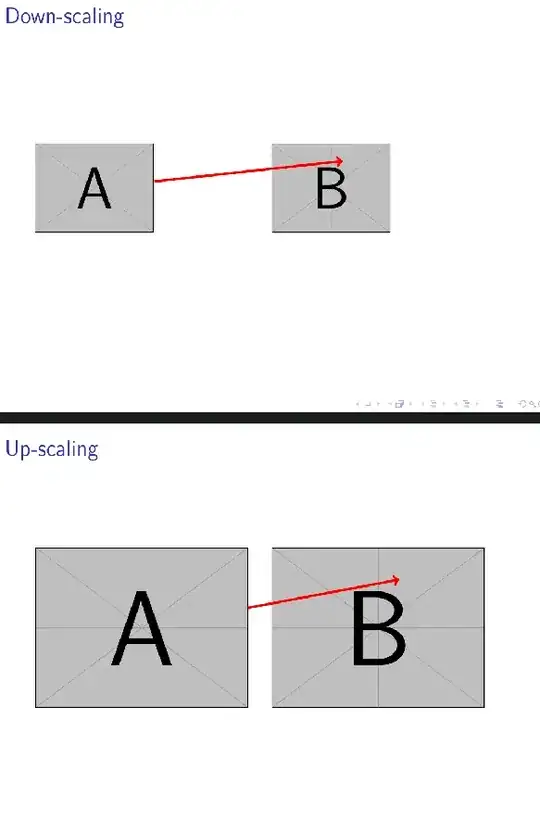
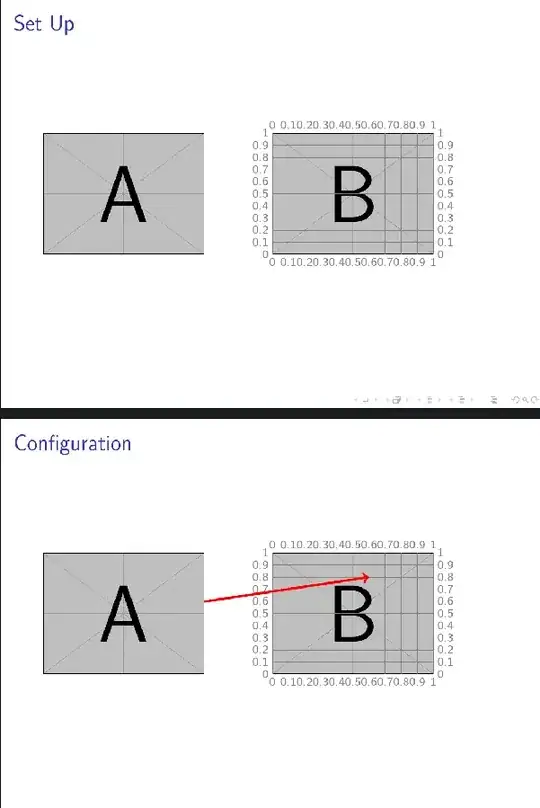
Basically, you divide the target image into a grid, which you print over the top during development and use for placing things. This grid is relative to the picture size, so (0.5,0.5) is always at the centre, (0.1,0.4) is always 10% up from the bottom and 40% across from the left. Hence, if you change the picture size, your arrow will still point to the same part of the image.
The method is based on existing answers, especially Caramdir's and Jake's, but it is convenient enough to be worth packaging for your own use. The approach is not specific to included graphics, of course. It can be used with anything you can put into a (rectangular) node.
\begin{filecontents}[overwrite]{tikz-box-helper.sty}
\ProvidesPackage{tikz-box-helper.sty}
% cfr
\RequirePackage{tikz}
\usetikzlibrary{positioning}
% ateb: https://tex.stackexchange.com/a/374029/ addaswyd o gwestiwn Skeleton Bow: https://tex.stackexchange.com/q/374012/
% copi fel tikz-boxhelper.tex yn y lle arferol
% Datrysiad addaswyd o atebion i gwesiwn http://tex.stackexchange.com/questions/9559/drawing-on-an-image-with-tikz gan Caramdir (https://tex.stackexchange.com/a/9561/) a Jake (https://tex.stackexchange.com/a/9562/)
\newif\ifhelpermarks
\newenvironment{boxhelper}[2][]{%
  \begin{scope}[shift=(#2.south west), x=(#2.south east), y=(#2.north west), #1]%
    \ifhelpermarks
      \begin{pgfinterruptboundingbox}%
        \begin{scope}[every helper line, every node/.append style={every helper mark}]
          \foreach \i [evaluate=\i as \j using {\i/10}, evaluate=\i as \k using { \i>0 ? ( \i<10 ? 0.\i : 1 ) : 0 } ] in {0,1,...,10}%
          {%
            \node [below right=2.5pt and \j of #2.south west, anchor=north] {\k};
            \node [above left=\j and 2.5pt of #2.south west, anchor=east] {\k};
            \node [above right=2.5pt and \j of #2.north west, anchor=south] {\k};
            \node [above right=\j and 2.5pt of #2.south east, anchor=west] {\k};
            \draw (\j,0) -- (\j,1) (0,\j) -- (1,\j);
          }%
        \end{scope}%
      \fi
    }{%
      \ifhelpermarks
        \end{pgfinterruptboundingbox}%
      \fi
  \end{scope}%
}
\tikzset{%
  helper marks/.is if=helpermarks,
  helper marks/.initial=false,
  helper marks/.default=true,
  every helper mark/.style={help lines, font=\sffamily\scriptsize},
  every helper line/.style={help lines},
}
\endinput
\end{filecontents}
\documentclass{beamer}
\usepackage{tikz}
\usepackage{tikz-box-helper}
\begin{document}
\begin{frame}{Set Up}
  \begin{tikzpicture}[every node/.append style={inner sep=0pt}]
    \node (img1) {\includegraphics[width=.35\textwidth]{example-image-a}};
    \node [xshift=.5\textwidth] (img2) {\includegraphics[width=.35\textwidth]{example-image-b}};
    \begin{boxhelper}[helper marks]{img2}
\end{boxhelper}

\end{tikzpicture}
\end{frame}
\begin{frame}{Configuration}
  \begin{tikzpicture}[every node/.append style={inner sep=0pt}]
    \node (img1) {\includegraphics[width=.35\textwidth]{example-image-a}};
    \node [xshift=.5\textwidth] (img2) {\includegraphics[width=.35\textwidth]{example-image-b}};
    \begin{boxhelper}[helper marks]{img2}
      \draw [->,red,ultra thick] (img1) -- (0.6,0.8);
    \end{boxhelper}
  \end{tikzpicture}
\end{frame}
\begin{frame}{Two Figures}
  \begin{tikzpicture}[every node/.append style={inner sep=0pt}]
    \node (img1) {\includegraphics[width=.35\textwidth]{example-image-a}};
    \node [xshift=.5\textwidth] (img2) {\includegraphics[width=.35\textwidth]{example-image-b}};
    \begin{boxhelper}{img2}
      \draw [->,red,ultra thick] (img1) -- (0.6,0.8);
    \end{boxhelper}
  \end{tikzpicture}
\end{frame}
\begin{frame}{Down-scaling}
  \begin{tikzpicture}[every node/.append style={inner sep=0pt}]
    \node (img1) {\includegraphics[width=.25\textwidth]{example-image-a}};
    \node [xshift=.5\textwidth] (img2) {\includegraphics[width=.25\textwidth]{example-image-b}};
    \begin{boxhelper}{img2}
      \draw [->,red,ultra thick] (img1) -- (0.6,0.8);
    \end{boxhelper}
  \end{tikzpicture}
\end{frame}
\begin{frame}{Up-scaling}
  \begin{tikzpicture}[every node/.append style={inner sep=0pt}]
    \node (img1) {\includegraphics[width=.45\textwidth]{example-image-a}};
    \node [xshift=.5\textwidth] (img2) {\includegraphics[width=.45\textwidth]{example-image-b}};
    \begin{boxhelper}{img2}
      \draw [->,red,ultra thick] (img1) -- (0.6,0.8);
    \end{boxhelper}
  \end{tikzpicture}
\end{frame}
\end{document}
The image below is crappy due to the buggyness of KDE6/current Okular. The PDF is fine.
Development:
Result:
Scaling: