31

In order to revise a draft, and identify related sections, I would like to identify similar words (by color of text, highlight, underline, or otherwise) according to topic.

For example, I would like all uses of the terms "foo" or "bar" highlighted red and all uses of "biz" and "baz" highlighted green.

There might be four or five groups of words or word roots that I want to specify. This is only for revision, so it can be rather crude.

For example, replace this:

enter image description here

with this:

enter image description here

(In the example, it is hard to see the green text; perhaps bold+color or underline would be more useful)

Update A related question provides an answer using XeLaTex. My document does not compile with XeLaTex, I would prefer a solution compatible with pdflatex if available (since that is what I use), though my document also compiles with luatex.

Other related questions:

  • See format special words in text There have been at least one other similar question, but I couldn't find that at the moment. – Torbjørn T. Jun 04 '15 at 18:55
  • @TorbjørnT. Thanks. You are correct that the questions are duplicates, though the answer provided requires xelated; I've updated my question to request a pdflatex solution, which I would prefer. – David LeBauer Jun 04 '15 at 19:01
  • 1
    Must it be done in pdf(La)TeX? String manipulation is easily done in sed, awk, etc., etc. -- probably done much faster, too. But maybe the stringstrings package is of interest (its author might stop by for a more definitive answer, as I've never used it).... – jon Jun 04 '15 at 19:04
  • @jon I don't say it must be done in pdflatex, only that this would be preferable since I use pdflatex and am not sure if another compiler would be compatible with the packages I currently use. – David LeBauer Jun 04 '15 at 19:09
  • Are the search terms complete words, or would you want to highlight "bar" as part of the word "millibar" for example? – Steven B. Segletes Jun 04 '15 at 19:22
  • @StevenB.Segletes ideally, highlight "bar" as part of the word, so that I can identify prefixes. But the solution doesn't have to be perfect, just a general overview so I can map related sections. – David LeBauer Jun 04 '15 at 19:31
  • @jon Actually, I just tried compiling with lualatex and it ran without error. I had previously tried compiling with luatex, which is what made me cautious. – David LeBauer Jun 04 '15 at 19:32
  • Well, then I'd do something like sed 's/foo/\\textcolor{red}{foo}/g' > testfile.tex and check the testfile. You can feed sed an external file with the -f switch. You could put all your substitutions in that file. Watch out with your preamble, of course! – jon Jun 04 '15 at 20:07
  • What OS are you on? This is a fun challenge for the TeXies, but it's practically a one-liner if you use a more appropriate tool (sed on Linux/OS X, or an easy-to-install scripting language on Windows). – alexis Jun 05 '15 at 11:47
  • @alexis I am using Ubuntu... a scripted solution would be great. – David LeBauer Jun 05 '15 at 18:54

6 Answers6

21

Solution using LuaTeX callbacks. Library luacolor.lua from luacolor is also used.

First package luahighlight.sty:

\ProvidesPackage{luahighlight}
%\RequirePackage{luacolor}
\@ifpackageloaded{xcolor}{}{\RequirePackage{xcolor}}
\RequirePackage{luatexbase}
\RequirePackage{luacode}
\newluatexattribute\luahighlight
\begin{luacode*}
highlight = require "highlight"
luatexbase.add_to_callback("pre_linebreak_filter", highlight.callback, "higlight")
\end{luacode*}

\newcommand\highlight[2][red]{ \bgroup \color{#1} \luaexec{highlight.add_word("\luatexluaescapestring{\current@color}","\luatexluaescapestring{#2}")} \egroup }

% save default document color \luaexec{highlight.default_color("\luatexluaescapestring{\current@color}")}

% Use new attribute register in \set@color \protected\def\set@color{% \setattribute\luahighlight{% \directlua{% oberdiek.luacolor.get("\luaescapestring{\current@color}")% }% }% \aftergroup\reset@color }

% stolen from luacolor.sty \def\reset@color{} \def\luacolorProcessBox#1{% \directlua{% oberdiek.luacolor.process(\number#1)% }% } \directlua{% if luatexbase.callbacktypes.pre_shipout_filter then token.get_next() end }@secondoftwo@gobble{ \RequirePackage{atbegshi}[2011/01/30] \AtBeginShipout{% \luacolorProcessBox\AtBeginShipoutBox } } \endinput

command \highlight is provided, with one required and one optional parameters. required is highlighted word, optional is color. In pre_linebreak_filter callback, words are collected and when matched, color information is inserted.

Lua module, highlight.lua:

local M = {}

require "luacolor"

local words = {} local chars = {}

-- get attribute allocation number and register it in luacolor local attribute = luatexbase.attributes.luahighlight -- local attribute = oberdiek.luacolor.getattribute oberdiek.luacolor.setattribute(attribute)

-- make local version of luacolor.get

local get_color = oberdiek.luacolor.getvalue

-- we must save default color local default_color

function M.default_color(color) default_color = get_color(color) end

local utflower = unicode.utf8.lower function M.add_word(color,w) local w = utflower(w) words[w] = color end

local utfchar = unicode.utf8.char

-- we don't want to include punctation local stop = {} for _, x in ipairs {".",",","!","“","”","?"} do stop[x] = true end

local glyph_id = node.id("glyph") local glue_id = node.id("glue")

function M.callback(head) local curr_text = {} local curr_nodes = {} for n in node.traverse(head) do if n.id == glyph_id then local char = utfchar(n.char) -- exclude punctation if not stop[char] then local lchar = chars[char] or utflower(char) chars[char] = lchar curr_text[#curr_text+1] = lchar curr_nodes[#curr_nodes+1] = n end -- set default color local current_color = node.has_attribute(n,attribute) or default_color node.set_attribute(n, attribute,current_color) elseif n.id == glue_id then local word = table.concat(curr_text) curr_text = {} local color = words[word] if color then print(word) local colornumber = get_color(color) for _, x in ipairs(curr_nodes) do node.set_attribute(x,attribute,colornumber) end end curr_nodes = {} end end return head end

return M

we use pre_linebreak_filter callback to traverse the node list, we collect the glyph nodes (id 37) in a table and when we find a glue node (id 10, mainly spaces), we construct a word from collected glyphs. We have some prohibited characters (such as punctuation), which we strip out. All characters are lowercased, so we can detect even words at the beginning of sentences etc.

When a word is matched, we set attribute field of word glyphs to value under which is related color saved in luacolor library. Attributed are new concept in LuaTeX, they enable to store information in nodes, which can be processed later, as in our case, because at the shipout time, ale pages are processed by the luacolor library and nodes are colored, depending on their luahighlight attribute.

\documentclass{article}

\usepackage[]{xcolor} \usepackage{luahighlight} \usepackage{lipsum}

\highlight[red]{Lorem} \highlight[green]{dolor} \highlight[orange]{world} \highlight[blue]{Curabitur} \highlight[brown]{elit} \begin{document}

\def\world{earth} \section{Hello world}

Hello world, world? world! \textcolor{purple}{but normal colors works} too\footnote{And also footnotes, for instance. World WORLD wOrld}. Hello \world.

\lipsum[1-12] \end{document}

enter image description here enter image description here

Udi Fogiel
  • 3,824
michal.h21
  • 50,697
  • 1
    What happens if you define and use a macro \world – Aditya Jun 04 '15 at 22:01
  • 1
    @Aditya it depends on what the macro contains. If it contains "word", then it is highlighted, otherwise it isn't. Word matching and highlighting happens after all macros were expanded. – michal.h21 Jun 04 '15 at 22:13
  • Ah, so your code is much smarter than ConTeXt's m-translate module. Nice! – Aditya Jun 04 '15 at 22:39
  • @Aditya You could post a ConTeXt solution. – Manuel Jun 04 '15 at 23:10
  • Looks great, but I am getting an error using lualatex file.tex. The error is: ! LuaTeX error ./highlight.lua:19: attempt to call upvalue 'get_color' (a nil v alue) (log and sources). Am I doing this correctly? – David LeBauer Jun 05 '15 at 01:06
  • @Manuel: Added. – Aditya Jun 05 '15 at 04:49
  • @David do you have luacolor package installed? – michal.h21 Jun 05 '15 at 06:15
  • @michal.h21 ... maybe not. I updated from TexLive 2011 to 2013 and it runs great. Thanks! I favor this solution because it doesn't require any additional commands to wrap the text part of the document (between begin / end), and doesn't conflict with other functions like \section. – David LeBauer Jun 05 '15 at 18:57
  • It seems that registering a new attribute to luacolor override its own, and thus disabling all the usual color commands. I can make this code work in TeXLive 2019 but not in TeXLive 2020 (the only thing that needs to be changed is glyph node has id 29 and glue nodes has 12). Do you happen to know what has changed? – Udi Fogiel Oct 18 '23 at 08:07
  • @UdiFogiel thanks for the report. This answer is quite old and the node ids were stable back then. We should use node.id("node type") now. I've updated the code so it works. – michal.h21 Oct 18 '23 at 08:59
  • Thanks, but my main point is that the sentence "but normal colors works" is not purple... – Udi Fogiel Oct 18 '23 at 09:06
  • I think that oberdiek.luacolor.setattribute(attribute) overrides luacolor's attribute, but I'm not sure... – Udi Fogiel Oct 18 '23 at 09:07
  • For what it's worth, I've noticed that luacolor now use the pre_shipout_filter instead of atbeginshi or some kernel hook, but it isn't the problem. – Udi Fogiel Oct 18 '23 at 09:11
  • @UdiFogiel I've tried to fix this issue, but couldn't find a solution, mostly it was even worse and all text following the highlighted word was colored in the same color. – michal.h21 Oct 18 '23 at 13:55
  • Been there :). Thanks anyway. I'll ask a new question to see if any body knows. – Udi Fogiel Oct 18 '23 at 15:14
  • I've edited the .sty file, the problem was that luacolor redefine \set@color to use the attribute, but luahiglight.sty didn't. Feel free to revert the edit, or change it. – Udi Fogiel Oct 19 '23 at 02:35
  • @UdiFogiel ah, good catch, thanks! – michal.h21 Oct 19 '23 at 09:55
11

Here's another with l3regex.

\documentclass{scrartcl}
\usepackage{xcolor,xparse,l3regex}
\ExplSyntaxOn
\NewDocumentCommand \texthighlight { +m } { \david_texthighlight:n { #1 } }
\cs_new_protected:Npn \david_texthighlight:n #1
 {
  \group_begin:
  \tl_set:Nn \l_tmpa_tl { #1 }
  \seq_map_inline:Nn \g_david_highlight_colors_seq
   {
    \clist_map_inline:cn { g_david_highlight_##1_clist }
     {
      \regex_replace_all:nnN { (\W)####1(\W) }
       { \1\c{textcolor}\cB\{##1\cE\}\cB\{####1\cE\}\2 } \l_tmpa_tl
     }
   }
  \tl_use:N \l_tmpa_tl
  \group_end:
 }
\seq_new:N \g_david_highlight_colors_seq
\NewDocumentCommand \addhighlighting { O{red} m }
 {
  \seq_if_in:NnF \g_david_highlight_colors_seq { #1 }
   { \seq_gput_right:Nn \g_david_highlight_colors_seq { #1 } }
  \clist_if_exist:cF { g_david_highlight_#1_clist }
   { \clist_new:c { g_david_highlight_#1_clist } }
  \clist_gput_right:cn { g_david_highlight_#1_clist } { #2 }
 }
\ExplSyntaxOff

\addhighlighting{amet,Mauris,ut,et,leo}
\addhighlighting[blue]{Phasellus,vestibulum}

\begin{document}
\texthighlight{Lorem ipsum dolor foo sit amet, bar consectetuer adipiscing
elit. Ut purus elit, vestibulum ut, placerat ac, adipiscing vitae, felis.
Curabitur dictum gravida mauris. Nam arcu libero, nonummy eget,
consectetuer id, vulputate a, magna. Donec vehicula augue eu
neque. Pellentesque habitant morbi tristique senectus et netus et
malesuada fames ac turpis egestas. Mauris ut leo. Cras viverra metus
rhoncus sem. Nulla et lectus foo vestibulum urna fringilla ultrices.
Phasellus eu tellus sit amet tortor gravida placerat. Integer sapien
est, iaculis in, pretium quis, viverra ac, nunc. Praesent eget sem
vel leo ultrices bibendum. Aenean faucibus. Morbi dolor nulla,
malesuada eu, pulvinar at, mollis ac, nulla. Curabitur auctor semper
nulla. Donec varius orci eget risus. Duis nibh mi, congue eu,
accumsan eleifend, bar sagittis quis, diam. Duis eget orci sit amet orci
dignissim rutrum.

Lorem ipsum dolor sit amet, consectetuer adipiscing elit. Ut
purus elit, vestibulum ut, placerat ac, adipiscing vitae, felis. Curabitur
dictum gravida mauris. Nam arcu libero, nonummy eget,
consectetuer id, foo vulputate a, magna. Donec vehicula augue eu
neque. Pellentesque habitant morbi tristique senectus et netus et
malesuada fames ac turpis egestas. Mauris ut leo. Cras viverra metus
rhoncus sem. Nulla et lectus vestibulum urna fringilla ultrices.
Phasellus eu tellus sit amet tortor gravida placerat. Integer sapien
est, iaculis in, pretium quis, viverra ac, bar nunc. Praesent eget sem
vel leo ultrices bibendum. Aenean faucibus. Morbi dolor nulla,
malesuada eu, pulvinar at, mollis ac, nulla. Curabitur auctor semper
nulla. Donec varius orci eget risus. Duis nibh mi, congue eu,
accumsan eleifend, sagittis quis, diam. Duis eget orci sit amet orci
dignissim rutrum.}
\end{document}

enter image description here

Manuel
  • 27,118
  • I am getting undefined control sequence ! Undefined control sequence. \\addhighlighting ..._seq {#1}}\clist_if_exist:cF {g_david_highlight_#1_clis... l.31 \addhighlighting{amet,Mauris,ut,et,leo} when I try to compile your example. I posted the source and log here. Did you test it? – David LeBauer Jun 05 '15 at 01:19
  • @David -- It works on a reasonably up to date system. You can check by adding \listfiles to the preamble and then examining the the .log. – jon Jun 05 '15 at 02:22
  • I see. Seems to work with TexLive 2013 but not TexLive 2011. Plus the log output is more informative in 2013 ... I'll do the upgrade. – David LeBauer Jun 05 '15 at 02:31
6

Strongly based on my answer at How to insert a symbol to the beginning of a line for which a word appears?. However, I had to extend the logic to handle multiple color assignments. Syntax is multiple invocations of \WordsToNote{space separated list}{color} and then \NoteWords{multiple paragraph input}

Macros in the input are limited to style (e.g., \textit) and size (e.g., \small) changes. Otherwise, only plain text is accepted.

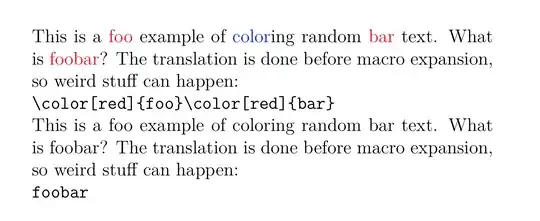
As detailed in the referenced answer, I adapt my titlecaps package, which normally capitalizes the first letter of each word in its argument, with a user-specified list of exceptions. Here, instead of capitalizing the words, I leave them intact. However, I trap the user-specified word exceptions and use them to set a different color.

In this extension of that method, I had to revise two titlecaps macros: \titlecap and \seek@lcwords.

The method cannot handle word subsets, but it can ignore punctuation.

EDITED to fix bug when flagged word appears with punctuation, and issue with first word of paragraphs.

\documentclass{article}
\usepackage{titlecaps}
\makeatletter
\renewcommand\titlecap[2][P]{%
  \digest@sizes%
  \if T\converttilde\def~{ }\fi%
  \redefine@tertius%
  \get@argsC{#2}%
  \seek@lcwords{#1}%
  \if P#1%
    \redefine@primus%
    \get@argsC{#2}%
    \protected@edef\primus@argi{\argi}%
  \else%
  \fi%
  \setcounter{word@count}{0}%
  \redefine@secundus%
  \def\@thestring{}%
  \get@argsC{#2}%
  \if P#1\protected@edef\argi{\primus@argi}\fi%
  \whiledo{\value{word@count} < \narg}{%
    \addtocounter{word@count}{1}%
    \if F\csname found@word\roman{word@count}\endcsname%
      \notitle@word{\csname arg\roman{word@count}\endcsname}%
      \expandafter\protected@edef\csname%
           arg\roman{word@count}\endcsname{\@thestring}%
    \else
      \notitle@word{\csname arg\roman{word@count}\endcsname}%
      \expandafter\protected@edef\csname%
         arg\roman{word@count}\endcsname{\color{%
           \csname color\romannumeral\value{word@count}\endcsname}%
      \@thestring\color{black}{}}%
    \fi%
  }%
  \def\@thestring{}%
  \setcounter{word@count}{0}%
  \whiledo{\value{word@count} < \narg}{%
    \addtocounter{word@count}{1}%
    \ifthenelse{\value{word@count} = 1}%
   {}{\add@space}%
    \protected@edef\@thestring{\@thestring%
      \csname arg\roman{word@count}\endcsname}%
  }%
  \let~\SaveHardspace%
  \@thestring%
  \restore@sizes%
\un@define}

% SEARCH TERTIUS CONVERTED ARGUMENT FOR LOWERCASE WORDS, SET FLAG
% FOR EACH WORD (T = FOUND IN LIST, F= NOT FOUND IN LIST)
\renewcommand\seek@lcwords[1]{%
\kill@punct%
  \setcounter{word@count}{0}%
  \whiledo{\value{word@count} < \narg}{%
    \addtocounter{word@count}{1}%
    \protected@edef\current@word{%
      \csname arg\romannumeral\value{word@count}\endcsname}%
    \def\found@word{F}%
    \setcounter{lcword@index}{0}%
    \expandafter\def\csname%
            found@word\romannumeral\value{word@count}\endcsname{F}%
    \whiledo{\value{lcword@index} < \value{lc@words}}{%
      \addtocounter{lcword@index}{1}%
      \protected@edef\current@lcword{%
        \csname lcword\romannumeral\value{lcword@index}\endcsname}%
%% THE FOLLOWING THREE LINES ARE FROM DAVID CARLISLE
  \protected@edef\tmp{\noexpand\scantokens{\def\noexpand\tmp%
   {\noexpand\ifthenelse{\noexpand\equal{\current@word}{\current@lcword}}}}}%
  \tmp\ifhmode\unskip\fi\tmp
%%
      {\expandafter\def\csname%
            found@word\romannumeral\value{word@count}\endcsname{T}%
      \expandafter\protected@edef\csname color\romannumeral\value{word@count}\endcsname{%
       \csname CoLoR\csname lcword\romannumeral\value{lcword@index}\endcsname\endcsname}%
      \setcounter{lcword@index}{\value{lc@words}}%
      }%
      {}%
    }%
  }%
\if P#1\def\found@wordi{F}\fi%
\restore@punct%
}
\makeatother
\usepackage{xcolor}
\newcommand\WordsToNote[2]{\Addlcwords{#1}\edef\assignedcolor{#2}%
  \assigncolor#1 \relax\relax}
\def\assigncolor#1 #2\relax{%
  \expandafter\edef\csname CoLoR#1\endcsname{\assignedcolor}%
  \ifx\relax#2\else\assigncolor#2\relax\fi%
}
\newcommand\NoteWords[1]{\NoteWordsHelp#1\par\relax}
\long\def\NoteWordsHelp#1\par#2\relax{%
  \titlecap[p]{#1}%
  \ifx\relax#2\else\par\NoteWordsHelp#2\relax\fi%
}
\begin{document}
\WordsToNote{foo bar at}{red}
\WordsToNote{Nulla dolor nulla}{cyan}
\WordsToNote{amet est et}{orange}
\WordsToNote{Lorem Ut ut felis}{green}
\NoteWords{
\textbf{Lorem ipsum dolor foo sit amet, bar consectetuer adipiscing elit}. Ut
purus elit, vestibulum ut, placerat ac, adipiscing vitae, felis. Curabitur
dictum gravida mauris. Nam arcu libero, nonummy eget,
consectetuer id, vulputate a, magna. Donec vehicula augue eu
neque. Pellentesque habitant morbi tristique senectus et netus et
malesuada fames ac turpis egestas. Mauris ut leo. Cras viverra metus
rhoncus sem. \textit{Nulla et lectus foo} vestibulum urna fringilla ultrices.
Phasellus eu tellus sit amet tortor gravida placerat. Integer sapien
est, iaculis in, pretium quis, viverra ac, nunc. Praesent eget sem
vel leo ultrices bibendum. \scshape Aenean faucibus. Morbi dolor nulla,
malesuada eu, pulvinar at, mollis ac, nulla. Curabitur auctor semper
nulla. Donec varius orci eget risus. \upshape Duis nibh mi, congue eu,
accumsan eleifend, bar sagittis quis, diam. Duis eget orci sit amet orci
dignissim rutrum.

\textsf{Lorem ipsum dolor sit amet}, consectetuer adipiscing elit. Ut
purus elit, vestibulum ut, placerat ac, adipiscing vitae, felis. Curabitur
dictum gravida mauris. Nam arcu libero, nonummy eget,
consectetuer id, foo vulputate a, magna. Donec vehicula augue eu
neque. Pellentesque habitant morbi tristique senectus et netus et
malesuada fames ac turpis egestas. Mauris ut leo. Cras viverra metus
rhoncus sem. Nulla et lectus vestibulum urna fringilla ultrices.
Phasellus eu tellus sit amet tortor gravida placerat. Integer sapien
est, iaculis in, pretium quis, viverra ac, bar nunc. Praesent eget sem
vel leo ultrices bibendum. Aenean faucibus. Morbi dolor nulla,
malesuada eu, pulvinar at, mollis ac, nulla. Curabitur auctor semper
nulla. Donec varius orci eget risus. Duis nibh mi, congue eu,
accumsan eleifend, sagittis quis, diam. \Large Duis eget orci sit amet orci
dignissim rutrum.\normalsize
}
\end{document}

enter image description here

  • Note there is a bug associated when the tagged word appears in the text in conjunction with punctuation. I will work to resolve it. – Steven B. Segletes Jun 04 '15 at 20:55
  • Thanks. Really nice. As you said, it gets hung up on punctuation. It also seems to get hung up on the \section command (just add \section{foo} between paragraphs to reproduce ... – David LeBauer Jun 04 '15 at 21:35
  • @David I hope to fix the issue with punctuation, but there will be no way to process things like \section{} with this approach. – Steven B. Segletes Jun 05 '15 at 00:24
  • It would be sufficient to ignore, rather than process, these - is that possible? – David LeBauer Jun 05 '15 at 00:52
  • @David Fixed! (though a bit longer in length) I could not ignore the issue, because I had been using the actual word as part of a \csname macro to define a color. When punctuation was part of the actual word, it screwed up the associated \csname macro. – Steven B. Segletes Jun 05 '15 at 01:22
  • Thanks... I meant 'sufficient to ignore, rather than process section commands'. Of course its easy enough to \renewcommand{\section}{\textbf} ... – David LeBauer Jun 05 '15 at 01:28
  • @David I have "sexed up" my MWE a bit. And you are right, that one could basically redefine sectioning commands as the first thing one does, upon entry into the \NoteWords macro. – Steven B. Segletes Jun 05 '15 at 01:37
6

ConTeXt provides a proof of concept module for such translations: m-translate. You could use it to translate text, but the translation takes place before macro expansion. So, the method will fail if the translation string is part of a macro name.

The translation can be enabled and disabled using \enableinputtranstion and \disableinputtranslation. Here is an example, which a little wrapper macro for ease of input.

\usemodule[translate]

\define\defineautocoloring
    {\dodoubleargument\dodefineautocoloring}

\def\dodefineautocoloring[#1][#2]%
    {\def\dododefineautocoloring##1%
          {\translateinput[##1][{\color[#1]{##1}}]}%
     \processcommalist[#2]\dododefineautocoloring}

\defineautocoloring[red][foo, bar]
\defineautocoloring[blue][color]

\setuppapersize[A5]

\starttext

\enableinputtranslation

This is a foo example of coloring random bar text. What is foobar? The
translation is done before macro expansion, so weird stuff can happen:

\type{foobar}

\disableinputtranslation

This is a foo example of coloring random bar text. What is foobar? The
translation is done before macro expansion, so weird stuff can happen:

\type{foobar}

\stoptext

which gives

enter image description here

Aditya
  • 62,301
4

Here's a simple script that will mark up words that you specify by editing the script-- it was the simplest way to handle lots of words and lots of different colors. It requires perl, which is standard on Unix (Linux/OS X) and a single download away on Windows. I'm assuming you have lots and lots of keywords to mark, so I've used perl which makes it easy to manage lists. Save it as a file highlight.pl, enter your keywords, and run it like this (commandline):

perl highlight.pl document.tex > edited-document.tex

The script builds lists of space-separated words with qw(...). If you need to highlight multi-word spans, ask me to add an example of the appropriate syntax. You can set it up for any number of colors. Note also that the words will be combined into a regular expression, so you could use wildcards if needed.

#!/usr/bin/perl 

# Enter all the keys to highlight here, separated by whitespace. The lists
# can extend over any number of lines. 
$keywords = join("|", qw(foo bar));
$trouble = join("|", qw(
biz 
baz
));

while (<>) {
      if (m/\\begin\{document\}/..m/\\end\{document\}/) {
         s/\b($keywords)\b/\\keyword{$1}/g;
         s/\b($trouble)\b/\\needswork{$1}/g;
      }
      print;
}

The script will skip the preamble and substitute only in the body of the document. I demonstrate with two kinds of highlighting, \keyword{..} and \needswork{...}. What they do is up to you; use whatever macro names you want, and define them in your document's preamble.

alexis
  • 7,961
  • lots of great answers here provided me with insight into the capabilities of various *tex implementations; +50 for identifying and scripting the core features as a generic and adaptable solution. – David LeBauer Jun 10 '15 at 16:02
  • Thanks! I should explain that I chose to do it this way because you wanted multiple colors; otherwise it's simple to write a fully generic script that is fully controlled from the command line, and reads a word list from a file-- i.e. no editing the script every time. – alexis Jun 10 '15 at 16:31
  • Thank you for your answer, but, can you explain more about how to make this work with CJK character? For example, if I want to change all the Chinese word 最早 to \specialformat{最早}. – Qi Tianluo Oct 24 '21 at 08:02
2

Having answered a related question, Automatically highlighting nominalizations (a.k.a. zombie nouns) as a writing aid, I realized the listofitems could also perform this task rather simply.

UPDATE for handling capitalization and punctuation.

The item list is parsed on three levels: first by designated key words, then by spaces, and finally by designated punctuation. We loop through the list arising from the 1st level of parsing. Text between the key words is output in the raw (see \x in the \colorize macro). Then, each keyword that is parsed has to be analyzed: the \if\relax\thewords[,,]\relax tests determine if the keyword is surrounded by either a space or any designated punctuation to the left and right sides. If so, the keyword is output in colorized form. However if not, it means the keyword was part of a larger word (like "boo" inside of "TeXbook") and is thus excluded from colorization.

The key for building the parse list and designating the colors is the \setcolor{<word>}{<color>} macro. For a word like foo, It creates a macro \foocolor that will hold the designated color for foo. Also, if foo is the first word designated it appends the parselist with foo, otherwise it appends the parselist with ||foo. It also repeats the process for the capitalized version of the word. This means, for this example, the final \theparselist becomes {foo||Foo||bar||Bar||baz||Baz||biz||Biz} which is the listofitems syntax for parsing any of those 4 words on the 1st level.

\documentclass{article}
\usepackage{listofitems,xcolor}
\newcounter{colorwords}
\newcommand\colorize[1]{%
  \expandafter\setsepchar\expandafter{\theparselist/ /,||.||!||?||;||:||-}%
  \reademptyitems%
  \greadlist\thewords{#1}%
  \foreachitem\x\in\thewords[]{%
    \x%
    \ifnum\xcnt<\listlen\thewords[]\relax%
      \if\relax\thewords[\xcnt,-1,-1]\relax%
        \if\relax\thewords[\the\numexpr\xcnt+1,1,1]\relax%
          \textcolor{\csname\thewordssep[\xcnt]color\endcsname}{\thewordssep[\xcnt]}%
        \else%
          \thewordssep[\xcnt]%
        \fi%
      \else%
        \thewordssep[\xcnt]%
      \fi%
    \fi%
  }%
}
\def\theparselist{}
\makeatletter
\newcommand\setcolor[2]{%
  \stepcounter{colorwords}%
  \ifnum\value{colorwords}=1\g@addto@macro\theparselist{#1}\else%
    \g@addto@macro\theparselist{||#1}\fi
  \expandafter\def\csname#1color\endcsname{#2}%
  \edef\thestring{\Capitalize#1\relax}%
  \g@addto@macro\theparselist{||}
  \expandafter\g@addto@macro\expandafter\theparselist\expandafter{\thestring}
  \expandafter\def\csname\thestring color\endcsname{#2}%
}
\makeatother
\def\Capitalize#1#2\relax{%
  \ifcase\numexpr`#1-`a\relax
   A\or B\or C\or D\or E\or F\or G\or H\or I\or J\or K\or L\or M\or
   N\or O\or P\or Q\or R\or S\or T\or U\or V\or W\or X\or Y\or Z\else
   #1\fi#2%
}
\begin{document}
\setcolor{foo}{red}
\setcolor{bar}{blue!70}
\setcolor{baz}{cyan}
\setcolor{biz}{green!70!black}
\colorize{Lorem ipsum dolor foo sit amet bar: consectetuer adipiscing elit baz! Ut purus elit,
vestibulum ut, placerat ac, adipiscing vitae, felis. Baz curabitur baz dictum gravida
mauris. Nam  biz arcu libero, nonummy eget, consectetuer id, vulputate a, bar magna.
Donec vehicula augue eu neque. foox xfoo ,foo foo, foo. xfoox meta -foo meta-foo
foo-bar.}
\end{document}

enter image description here

An expanded version of this answer, to handle searches for intra-word phrases, in addition to the "whole-word" phrases of this answer, can be found here: Change color of all occurences of particular character in entire document.