A different approach could be to exploit the styles defined in Highlighting in Beamer using TikZ nodes.
The code:
\documentclass{beamer}
\usepackage{lmodern}
\usepackage{tikz}
\usetikzlibrary{calc}
\usepackage{xparse}
\tikzset{
invisible/.style={opacity=0,text opacity=0},
visible on/.style={alt=#1{}{invisible}},
alt/.code args={<#1>#2#3}{%
\alt<#1>{\pgfkeysalso{#2}}{\pgfkeysalso{#3}}
},
}
\tikzset{
background fill/.style={fill=#1},
background fill/.default={white},
fill on/.style={alt=#1{}{background fill}},
}
\tikzset{
background draw/.style={draw=#1},
background draw/.default={white},
draw on/.style={alt=#1{}{background draw}},
}
\tikzset{
background filldraw/.style args={#1 filled by #2}{draw=#1, fill=#2},
background filldraw/.default=white filled by white,
filldraw on/.style={alt=#1{}{background filldraw}},
}
\tikzset{highlighting/.style={
append after command={
\pgfextra{
\path[rounded corners,
background draw=red,
draw on=<#1>,
overlay] ($(\tikzlastnode.south west)+(-0.015,-0.1)$) % to have some offset
rectangle ($(\tikzlastnode.north east)+(0.015,0.065)$);
}
}
}
}
\NewDocumentCommand{\highlight}{r<> m}{%
\tikz[baseline=(A.base)]
\node[highlighting=#1,
inner sep=0pt] (A) {#2};%
}
\begin{document}
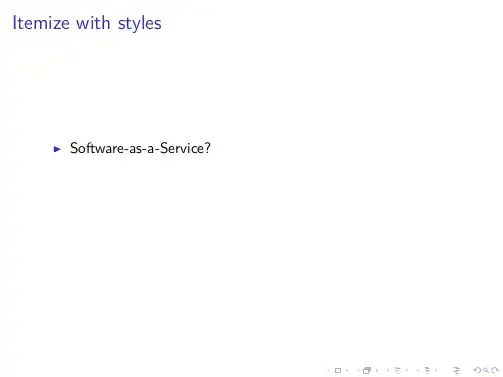
\begin{frame}{Itemize with styles}
\begin{itemize}[<+->]
\item Software-as-a-Service?
\item Platform-as-a-Service?
\item \highlight<5>{Infrastructure-as-a-Service}?
\item Other-stuff-as-a-Service?
\end{itemize}
\end{frame}
\end{document}
The result:
Notes on the code
The TikZ node created does not occupy to much space due to the option inner sep=0pt, but since its dimensions are very tight around the text, the highlighting box created adds some space around (via offsets created thanks to the calc library). In order to avoid that this extra space may corrupts the alignment, the overlay option has been introduced to the highlighting path.
Now, without changing anything inside the document, it is possible to obtain different effects by selecting the different styles:
\tikzset{highlighting/.style={
   append after command={
   \pgfextra{
      \path[rounded corners,
         background fill=red!30, % filling
         fill on=<#1>, % filling overlay specification
         overlay] ($(\tikzlastnode.south west)+(-0.015,-0.1)$) % to have some offset
         rectangle ($(\tikzlastnode.north east)+(0.015,0.065)$);
      }
    }
  }
}
gives:

while:
\tikzset{highlighting/.style={
   append after command={
   \pgfextra{
      \path[rounded corners,
         background filldraw=red filled by red!30, % border+filling
         filldraw on=<#1>, % overlay specification
         overlay] ($(\tikzlastnode.south west)+(-0.015,-0.1)$) % to have some offset
         rectangle ($(\tikzlastnode.north east)+(0.015,0.065)$);
      }
    }
  }
}
gives:

Customizable offsets
With this improved version it is possible to customize the highlighted area (an idea borrowed from the hf-tikz package) via offsets. This offsets ultimately are pgfkeys whose values have to be declared within the optional argument of the \highlight command:
\highlight<overlay specification>[offsets]{text}
If no [offsets] are specified, the initial values are taken.
The code:
\documentclass{beamer}
\usepackage{lmodern}
\usepackage{tikz}
\usetikzlibrary{calc}
\usepackage{xparse}

\tikzset{
    invisible/.style={opacity=0,text opacity=0},
    visible on/.style={alt=#1{}{invisible}},
    alt/.code args={<#1>#2#3}{%
      \alt<#1>{\pgfkeysalso{#2}}{\pgfkeysalso{#3}}
    },
}

\tikzset{
  background fill/.style={fill=#1},
  background fill/.default={white},
  fill on/.style={alt=#1{}{background fill}},
}

\tikzset{
  background draw/.style={draw=#1},
  background draw/.default={white},
  draw on/.style={alt=#1{}{background draw}},
}

\tikzset{
  background filldraw/.style args={#1 filled by #2}{draw=#1, fill=#2},
  background filldraw/.default=white filled by white,
  filldraw on/.style={alt=#1{}{background filldraw}},
}

\pgfkeys{/highlight/.cd,
  above right offset/.initial={0.015,0.065},
  above right offset/.get=\aboverightoffset,
  above right offset/.store in=\aboverightoffset,
  below left offset/.initial={-0.015,-0.1},
  below left offset/.get=\belowleftoffset,
  below left offset/.store in=\belowleftoffset,
}

\tikzset{highlighting/.style={
   append after command={
   \pgfextra{
      \path[rounded corners,
         background filldraw=red filled by red!30,% border+filling
         filldraw on=<#1>, % overlay specification
         overlay] ($(\tikzlastnode.south west)+(\belowleftoffset)$) % to have some offset
         rectangle ($(\tikzlastnode.north east)+(\aboverightoffset)$);
      }
    }
  }
}

\NewDocumentCommand{\highlight}{r<> O{} m}{%
\pgfkeys{/highlight/.cd,#2}
\tikz[baseline=(A.base)]
 \node[highlighting=#1,
   inner sep=0pt] (A) {#3};%
}

\begin{document}

\begin{frame}{Itemize with styles}
\begin{itemize}[<+->]
  \item Software-as-a-Service?
  \item Platform-as-a-Service?
  \item \highlight<5>{Infrastructure-as-a-Service}?
  \item \highlight<6>[below left offset={-0.1,-0.2},above right offset={0.25,0.15}]{Other-stuff-as-a-Service}?
\end{itemize}
\end{frame}

\end{document}
The result:


\only<-2>{Infrastructure-as-a-Service}. All you want is to have a boxed item to appear on frames 3 onwards? – Gonzalo Medina Apr 05 '13 at 16:14